


Rechargeable batteries are ubiquitous today, powering many of our everyday devices like phones, laptops, power tools, and more. However, over time rechargeable batteries can lose capacity or stop working properly. Rather than throwing them out and buying expensive replacements, repairing battery packs yourself can save you money.
In this guide, as a professional lithium battery pack manufacturer, I will walk through the steps for repairing common types of rechargeable battery packs.
How to Repair Rechargeable Battery Packs?
Testing and Diagnosing Battery Pack Issues
The first step is to test your battery pack to identify any issues. Testing lets you pinpoint which cells may have failed so only those need to be replaced.
Check Overall Voltage
Use a multimeter to measure your battery’s voltage. Compare this to the rated voltage for that pack when fully charged. A significant drop indicates fading capacity or cell issues.
For a 14.4V lithium ion pack, any voltage under 13V means it likely needs repair. Nicad or NiMH packs often can still operate down to around 70% of rated voltage.
Look for Physical Damage
Inspect each battery cell for any dents, cracks, leaks or corrosion. Even small dents can cause internal shorts. Bulging or ballooned cells also indicate a failed battery. Replace any cells with physical defects.
Check Individual Cell Voltages
Test the voltage across the terminals of each cell. Healthy 18650 lithium cells show 4.2V when fully charged. Nicad or NiMH AA cells read around 1.25-1.3V per cell when good.
If certain cells read lower than the rest, those “weak” cells are failing and should get replaced. Cells with overly high voltage are also problematic from imbalance.
Measure Internal Resistance
Use an advanced battery analyzer to run an impedance check on each cell. Higher internal resistance results in excess heat, faster self-discharge and reduced capacity. Again cells outside the norm likely need replacement.
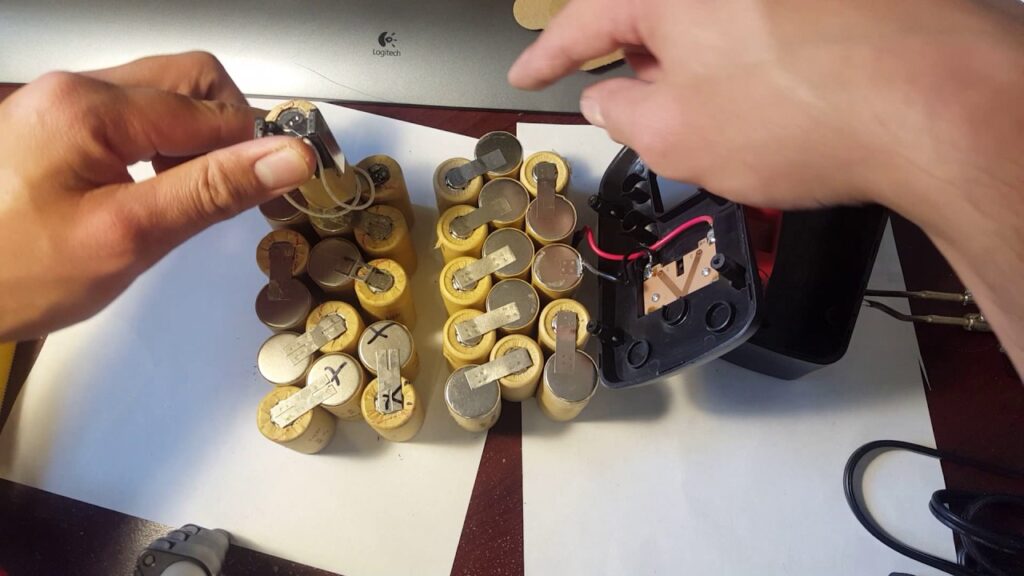
Replacing Faulty Battery Cells
Once you’ve identified bad cells, the next step is to swap in new functioning cells. Make sure replacement cells closely match remaining good cells in:
- Chemistry – NiMH cannot be mixed with nicad or lithium. The different chemistries have different voltages and charging requirements.
- Voltage & Capacity – Voltage and rated capacity should align to what you tested as functional cells. For voltage it needs to be very close, but a little variance in capacity is fine.
- Physical size – The dimensions of new cells (for cylindrical batteries) need to fit existing mounting. Watch length in particular.
Finding accurate replacements may involve some searching through specialty battery suppliers for older tools. For more common sizes like 18650 lithium, cells are readily available. You may also harvest good cells from other failed packs.
Soldering vs Spot Welding Batteries
How you connect cells into packs depends on battery chemistry. Never directly solder lithium cells – the heat can seriously damage them. Use a tab spot welder designed for lithium batteries.
Nicad and NiMH batteries can be carefully soldered if needed. Use a temperature controlled iron and heat the connection point as briefly as possible. But investing in a spot welder is better.
Either way make sure joints are solid with no risk of coming loose even with vibration. Insulate all cell side connections well.
Reassembling and Reconditioning Packs
Once faulty cells are swapped out, the pack can be reassembled. Pay close attention to polarity – make sure positive and negative orientation matches the original config.
For multi-cell lithium packs you’ll also want to balance the cells at this point. Use a lithium battery balancer/charger to top off weaker cells one by one to match the highest cell voltage. This avoids cell mismatch as the pack is recharged.
Some battery pack issues may just come down to imbalance between cells rather than bad cells. In this case a balance charger can recondition them without replacing any cells. Always balance lithium packs though – cell damage occurs quickly from over discharge when imbalanced.
With cells now balanced and connected, rebuild your pack. Make sure protective circuitry like charge controllers or fuses are restored correctly just like it was originally. Add thermal insulation around cells if applicable. Then reseal the battery case.
Testing Repaired Battery Packs
The final step is confirming your DIY battery rebuild works properly. Follow typical break-in procedures for that battery chemistry when you recharge them. Then run full discharge/charge cycles while monitoring cell voltages to validate all is working correctly.
Compare overall battery capacity to original rating to see expected runtimes. Monitor temperature during cycling – all cells should heat and cool evenly. If any issues pop up, examine connections and cell balance again. With testing complete, your custom rebuilt battery pack is ready for many more years of service!